Showing posts with label Warhammer. Show all posts
Monday, June 7, 2010
Super Blog Chain Give Away!!!
at
1:33 PM
Posted by
Howard Vaux
There is one week left in my Super Blog Chain Give away there is still time to enter for your chance to win a nice piece of terrain... so check it out scroll down or click here to enter
Good luck.........
Wednesday, May 26, 2010
Model Preparation Tips
at
1:08 AM
Posted by
Howard Vaux
I was reading over some blogs the other night and did not see a lot of stuff out there covering the basics of modeling .
This might be some real basic information to most of you.
My hope is that every one might at least learn some thing.
Here are some techniques that I have pick up form all different places and just doing it.
Mold Lines
The way I remove the lines is to scrape them at a slight angle to the mold line I do not fallow the line I am working on with the blade but rather pull it toward my self at the angle letting the contour of the model guide my direction. (picture B) If it is cylindrical like a leg I work the blade over the crest of the cylinder. I have found that fallowing the the line in a straight down will sometimes create a flat line taking down the curve. This is not always possible to do on. For longer straight flat lines you can fallow the line. I will also do this when filing down a mold line.
Seam Scraping.
Another thing I do is what I call seam scraping if I am butting two pieces together that you do not want the seam as visible. I will scrape the seam at a angle pulling crossed the seam. Then pull two pieces apart then glue them and put them back together and run the blade over it again one its set . It make a tighter fit and helps to hide the joint if it is not supposed to be seen.
This might be some real basic information to most of you.
My hope is that every one might at least learn some thing.
Here are some techniques that I have pick up form all different places and just doing it.
Mold Lines
Cleaning up mold lines I use the back of my hobby knife blade #11 blade there are two designs of blades (Picture A) I like to use the straight back (needle point) and a drop point I really like the blade with the drop point at the back of the tip it is a shorter edge to scrape with. Tighter spaces I go with the needle point blade it is nice if you have a fit in small tight places.Picture A
Pictures B
Mold Lines
The way I remove the lines is to scrape them at a slight angle to the mold line I do not fallow the line I am working on with the blade but rather pull it toward my self at the angle letting the contour of the model guide my direction. (picture B) If it is cylindrical like a leg I work the blade over the crest of the cylinder. I have found that fallowing the the line in a straight down will sometimes create a flat line taking down the curve. This is not always possible to do on. For longer straight flat lines you can fallow the line. I will also do this when filing down a mold line.
Seam Scraping.
Another thing I do is what I call seam scraping if I am butting two pieces together that you do not want the seam as visible. I will scrape the seam at a angle pulling crossed the seam. Then pull two pieces apart then glue them and put them back together and run the blade over it again one its set . It make a tighter fit and helps to hide the joint if it is not supposed to be seen.
Friday, April 16, 2010
Landspeeder Storm up date.
at
11:48 AM
Posted by
Howard Vaux
I have finished painting the faces of the land speeder scouts I am working out how to magnetize them so they can be put on a base. With my new classes schedule and amount of work I have to do in a short time it is consuming my life, I am sure after another week I will fall in the rhythm of it but this week has all but stopped me in my tracks .


Please feel free to comment or E-mail me at Howardvaux@yahoo.com
Saturday, February 20, 2010
Painting Tip
at
5:50 PM
Posted by
Howard Vaux
I read this priming tip over at Berks Warhammer 40K: 40K Tips: Drink Lots of Water (and save the bottles) I tried Inquisitor Lord Aki tip it was nice idea .
It worked nice I did not get paint on my hands when spraying. When I tried to paint with a brush the bottle was to big to hold and the cap was a little small for me to hold comfortably.
I was on the hunt to to find the replacement to the water bottle and I found it
right in my medicine cabinet there where a few pill bottles that where about to be thrown out so I saved them. here they are in action.
Now do not take you mom,dad,grandma’s or any one medication and remove it from the bottle just so you can use it wait until it is empty.
by all means do not take medicine that is not prescribed to you. I am throwing that one in there just in case
Edit:2-25-2010
I added a little sand to the bottom of each on to give a little weight just so it felt nice in my hand
I have shaky hands if i am holding some that is light or nothing at all
It worked nice I did not get paint on my hands when spraying. When I tried to paint with a brush the bottle was to big to hold and the cap was a little small for me to hold comfortably.
I was on the hunt to to find the replacement to the water bottle and I found it
right in my medicine cabinet there where a few pill bottles that where about to be thrown out so I saved them. here they are in action.
Now do not take you mom,dad,grandma’s or any one medication and remove it from the bottle just so you can use it wait until it is empty.
by all means do not take medicine that is not prescribed to you. I am throwing that one in there just in case
Edit:2-25-2010
I added a little sand to the bottom of each on to give a little weight just so it felt nice in my hand
I have shaky hands if i am holding some that is light or nothing at all
storage and transport
at
1:15 AM
Posted by
Howard Vaux
How do you store and transport your minis?
I have seen figure cases that look great and look like they would work like a charm but for 90 plus dollars come on that is a bit much even for me. I have bought and looked around my house for things I could use here are some things to use.
This is what I came up with
1. Small tool box 6$
2. Large tool box 10$
3. Large tackle box that was around the house.
What do you use? leave a comment
This is what I came up with
1. Small tool box 6$
2. Large tool box 10$
3. Large tackle box that was around the house.
What do you use? leave a comment
Wednesday, February 10, 2010
Model basing for the first time
at
5:31 PM
Posted by
Howard Vaux
The other day I went to the local train(hobby) store not much in general hobby supplies.
I did pick up a few things to try out for basing materials cork and some woodland scenic flock and grass
.
I like how the cork shapes. . I used some balsa wood for the little sign, I used some woodland scenic flock and some of their wild grass .
I did pick up a few things to try out for basing materials cork and some woodland scenic flock and grass
.
I like how the cork shapes. . I used some balsa wood for the little sign, I used some woodland scenic flock and some of their wild grass .
This is my first real go at doing a detailed base.
Monday, February 1, 2010
Ork assembly finished
at
6:34 PM
Posted by
Howard Vaux
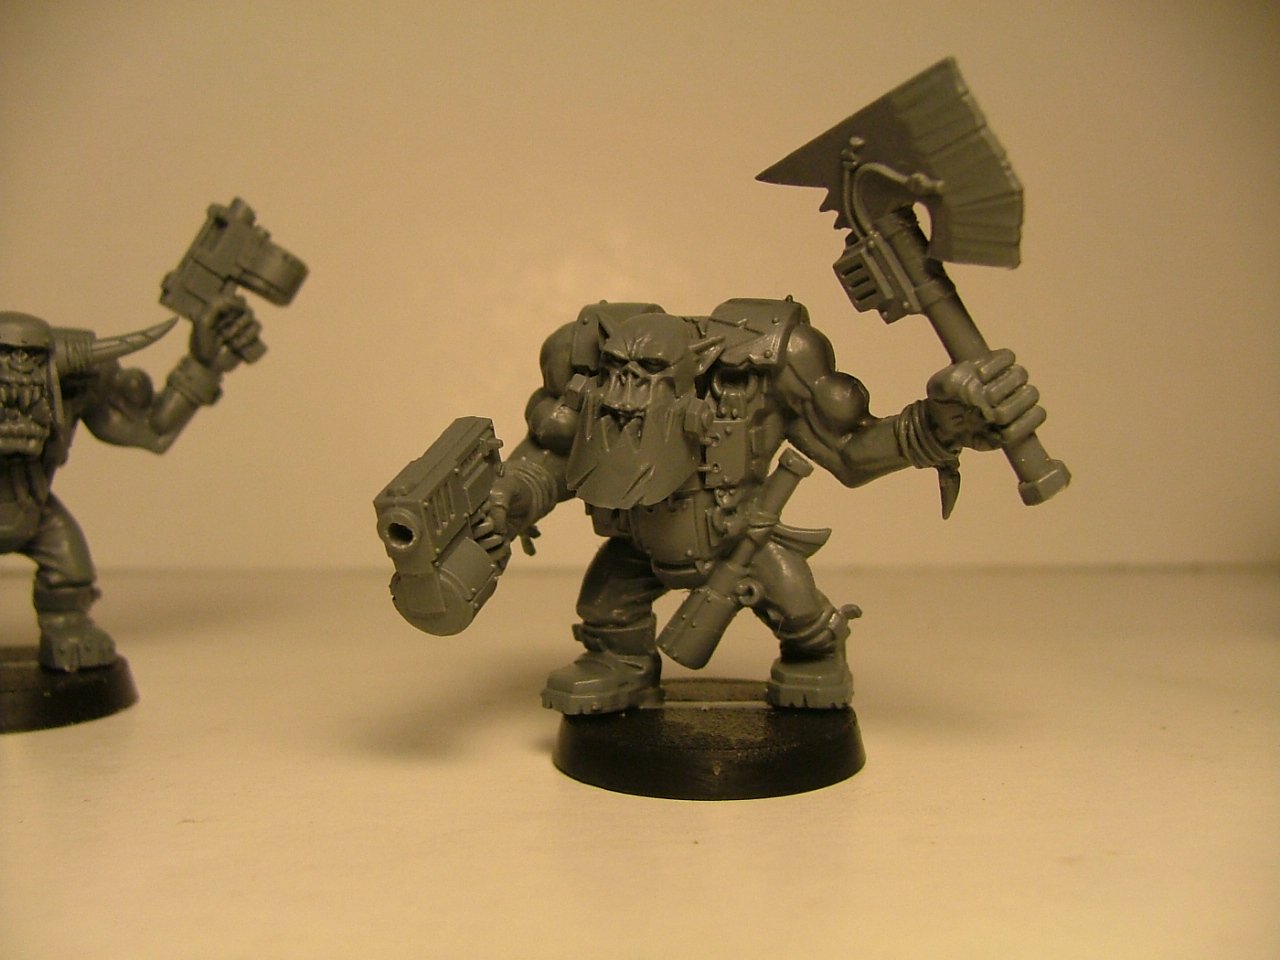
I have just finished my Ork models.
Now they are off to the cleaning station and then the paint booth for primer then painting
Thursday, January 28, 2010
Finishing up assembly
at
11:56 AM
Posted by
Howard Vaux
I am working on the last of my models from assault on black reach drilling out the gun barrels and basing them the next step is to prime and pain. I am still working on a paint scheme for my Space Marine army as for the Ork paint scheme was easy as they are well not as structured of a group as the Space Marines.
Saturday, January 16, 2010
Space Marines vs. Orks
at
10:11 AM
Posted by
Howard Vaux
I have Started to assemble my first army for Warhammer40k
I bought the Assault on Black Reach from GW.
I decided to start off With HQ and work my way down to the grunts alternating form Space Marines to Orks so far the figures have gone together good the dreadnought had some issues when it was being glued so far i am pleased with the plastic models that GW has put out.
I am still working on a paint scheme for both my army's this is not as important right now I still have around 40 more models to assemble I will be posting pictures soon .
When I am finished assembling and painting I am going to work on my first game board and scenery I am thinking of making it modular in 2'-2' sections and working a grid in to the design of the board but I am still getting my supplies together and working on getting my workshop finshed
I bought the Assault on Black Reach from GW.
I decided to start off With HQ and work my way down to the grunts alternating form Space Marines to Orks so far the figures have gone together good the dreadnought had some issues when it was being glued so far i am pleased with the plastic models that GW has put out.
I am still working on a paint scheme for both my army's this is not as important right now I still have around 40 more models to assemble I will be posting pictures soon .
When I am finished assembling and painting I am going to work on my first game board and scenery I am thinking of making it modular in 2'-2' sections and working a grid in to the design of the board but I am still getting my supplies together and working on getting my workshop finshed
Subscribe to:
Posts (Atom)